
Dear All..... Finally.. after a lot of waiting... our son was born on 16th September....
Its all exciting and wonderful!!!
He is keeping me busy all day, so will be away from blogging for a while. I shall keep posting when ever I have time.
Sunday 28 September 2008
Tuesday 26 August 2008
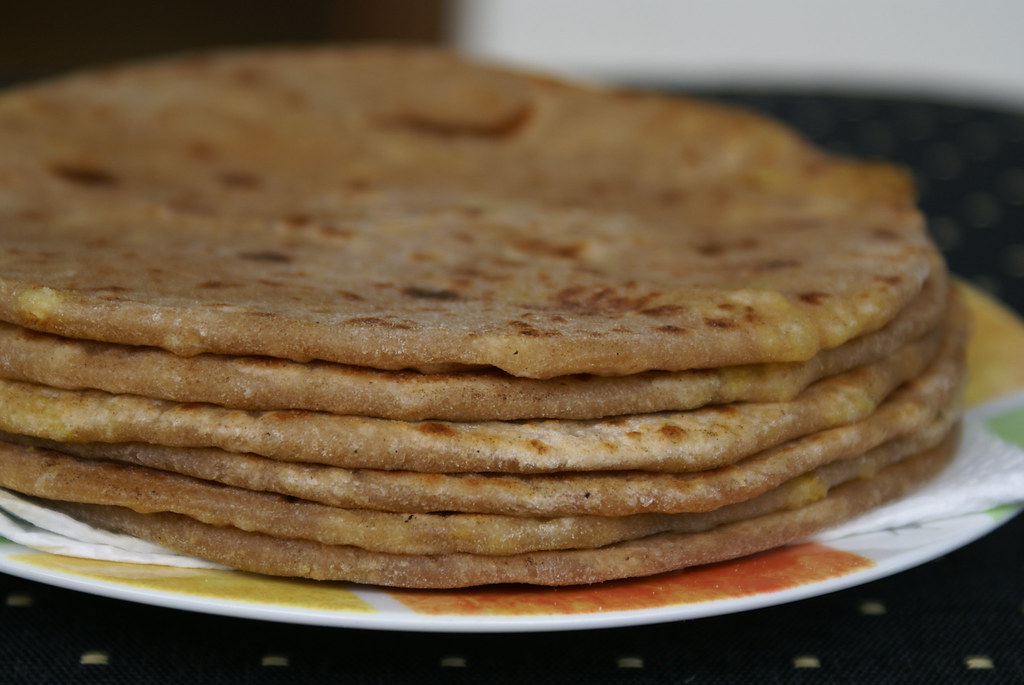
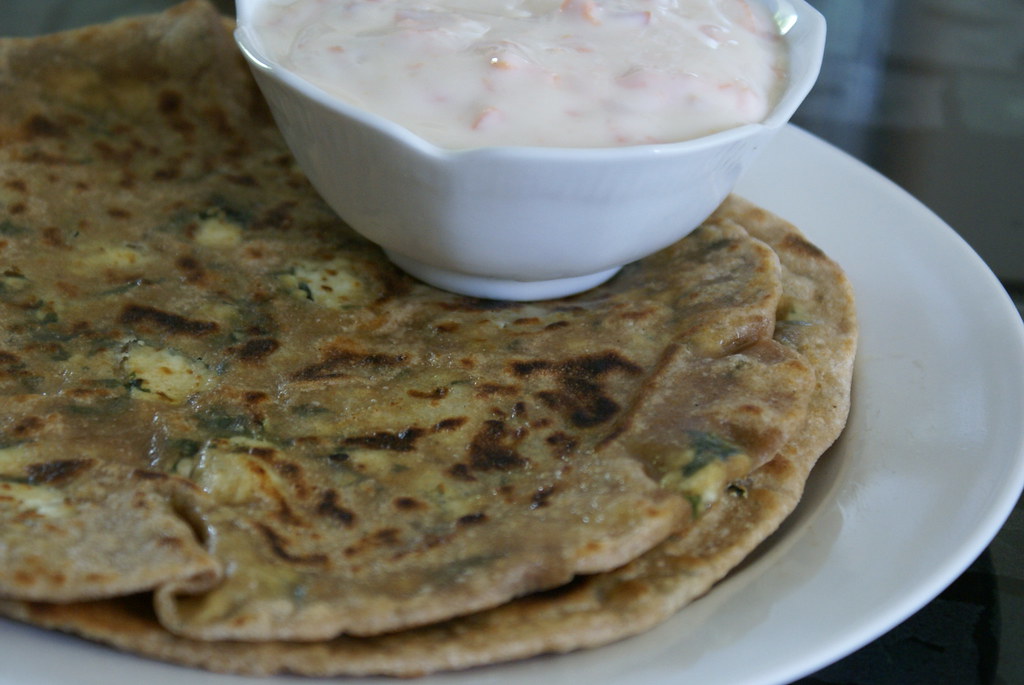
Yummy Gobi Parathas
I always tend to avoid buying Gobi when I go to Groceries becoz I find cutting Gobi into small florets a very tedious process. I had a Gobi which I bought last week and was untouched, so to get rid of it easily the only process that hit my mind was to grate it. And what do I do with grated Gobi...???? Hmmmm... Make Parathas Ofcourse :-)

Gobi Parathas
So here goes the recipe for the Gobi Parathas...
Ingredients:
For the Dough:
Whole Wheat Flour: 3 cups
All Purpose Flour: 1 cup
Yogurt: 2 tbsp
Warm Water: for kneading
Salt: to taste
For the Filling:
Cauliflower: 3 cups, grated
Onion: 1 small, finely chopped
Finely Chopped Garlic: 1 tsp
Finely Chopped Ginger: 1 tsp
Green Chillies: 4, finely chopped (Adjust acc to taste)
Jeera/Cumin Seeds: 1 tsp
Turmeric Powder: a pinch
Amchur/Dry Mango Powder: ½ tsp
Garam Masala: 1 tsp
Kitchen King Masala: 1/2 tsp
Fresh Coriander Leaves: a handful, finely chopped
Oil: 1 tsp
Salt: to taste

In the Making
How I did it:
Gobi Parathas
And the Verdict:
Parathas are always yummy.... and Gobi stuffing is different from the regular aloo we use. And it is not as heavy as Aloo Parathas.....
It is a perfect selection for Brunch.... tasty, healthy and filling :-)
More Paratha Recipes:
Mooli Paratha
Paneer-Methi Paratha
Wylde Woman Award:
LubnaKarim of Kitchen Flavours and Amu of Amu's World passed me on this "Wylde Woman Award".
 Purpose of the Award: To send love and acknowledgment to men and women, who brighten your day, teach you new things and live their lives fully with generosity and joy. It's been a blessing and an inspiration to meet all of you through your wonderful blogs.
Thank You girls for the sweet gesture, which helps me in motivating and make my blog better and better each day!!!
Gobi Parathas
So here goes the recipe for the Gobi Parathas...
Ingredients:
For the Dough:
Whole Wheat Flour: 3 cups
All Purpose Flour: 1 cup
Yogurt: 2 tbsp
Warm Water: for kneading
Salt: to taste
For the Filling:
Cauliflower: 3 cups, grated
Onion: 1 small, finely chopped
Finely Chopped Garlic: 1 tsp
Finely Chopped Ginger: 1 tsp
Green Chillies: 4, finely chopped (Adjust acc to taste)
Jeera/Cumin Seeds: 1 tsp
Turmeric Powder: a pinch
Amchur/Dry Mango Powder: ½ tsp
Garam Masala: 1 tsp
Kitchen King Masala: 1/2 tsp
Fresh Coriander Leaves: a handful, finely chopped
Oil: 1 tsp
Salt: to taste
In the Making
How I did it:
- Knead the dough with the whole wheat flour and maida, using curd and warm water. Cover the dough with a wet muslin cloth and let it rest for about 30 mins.
- Heat oil in a kadai and add cumin seeds.
- When it sizzles, add finely chopped onions, green chillies, ginger and garlic and fry for few mins.
- Add turmeric, dry mango powder, garam masala, kitchen king masala and mix well.
- Mix in grated cauliflower florets and salt to taste and fry for 4 to 5 mins till the Gobi becomes soft and the mixture is dry.
- Add finely chopped coriander leaves, and turn off the heat and let the stuffing come to a room temperature. The filling should cool down completely before starting the next step.
- Now roll out small balls of the dough and fill with 1 tbsp of the filling.
- Roll out the dough with a rolling pin. Dust liberally with flour to avoid the stickiness.
- Pat off the excess flour and roast on a hot griddle.
- Fry one side for 1 minute and then turn over and brush with a little oil.
- When the second side is done and golden brown, flip and brush with a little oil on that side too.
- Serve hot with raita.
Gobi Parathas
And the Verdict:
Parathas are always yummy.... and Gobi stuffing is different from the regular aloo we use. And it is not as heavy as Aloo Parathas.....
It is a perfect selection for Brunch.... tasty, healthy and filling :-)
More Paratha Recipes:
Mooli Paratha
Paneer-Methi Paratha
Wylde Woman Award:
LubnaKarim of Kitchen Flavours and Amu of Amu's World passed me on this "Wylde Woman Award".
 Purpose of the Award: To send love and acknowledgment to men and women, who brighten your day, teach you new things and live their lives fully with generosity and joy. It's been a blessing and an inspiration to meet all of you through your wonderful blogs.
Thank You girls for the sweet gesture, which helps me in motivating and make my blog better and better each day!!!
Thursday 21 August 2008
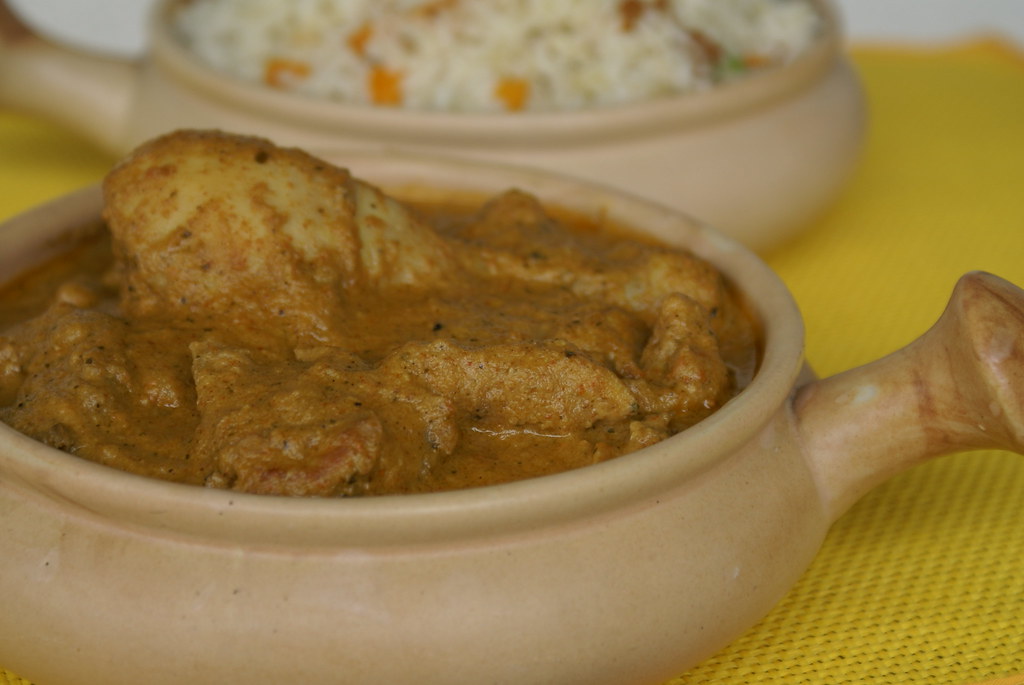
Flavoured Rice/Bagara Rice
Planning a menu is very important when you have a party or a get-together at home. When I have Rice varieties like Biryani, Pulav etc., I generally do not prepare curries with lots of masala in it, instead I opt for lighter versions of side dishes like raita and sambhar. On the other hand when I plan to have curries like Bagara Baingan, Chicken, Kofta etc., I opt for Plain white Rice, Jeera Rice, Saffron Rice or Flavoured Rice... also known as Bagara Rice in Hyderabad.

Bagara Rice
Bagara Rice is very simple and goes with any type of gravies. It does not have lots of masala in it, but just has the flavor and aroma of masala. Veggies are usually not added to it, but I add a few to make it colorful.
Ingredients:
Rice: 2 cups, uncooked
Water: 3 cups (1.5 cup water for 1 cup rice)
Onion: 1 small, optional
Ginger Garlic Paste: 2 tbps
Whole Masala:Mace: a 1 inch peice, Cloves:5, Cinnamon:1 inch piece, Black Cardamom: 1
Carrot: 1/2 cup, finely chopped
Peas: 1/2 cup, frozen
Salt: to taste
Ghee/Oil: 2 tbsp
How I did it:

Bagara Rice
And the Verdict:
As I said, it is perfect for parties and its mild flavor compliments with any type of gravy/curry.
Bagara Rice
Bagara Rice is very simple and goes with any type of gravies. It does not have lots of masala in it, but just has the flavor and aroma of masala. Veggies are usually not added to it, but I add a few to make it colorful.
Ingredients:
Rice: 2 cups, uncooked
Water: 3 cups (1.5 cup water for 1 cup rice)
Onion: 1 small, optional
Ginger Garlic Paste: 2 tbps
Whole Masala:Mace: a 1 inch peice, Cloves:5, Cinnamon:1 inch piece, Black Cardamom: 1
Carrot: 1/2 cup, finely chopped
Peas: 1/2 cup, frozen
Salt: to taste
Ghee/Oil: 2 tbsp
How I did it:
- Heat oil or ghee in a pressure cooker.
- Add onions(if using), fry for a min and add ginger garlic paste.
- Add the veggies and fry for a min.
- Add rice and water. Add salt to taste.
- Tie all the whole masalas in a muslin cloth or in a tea strainer and drop in the water.
- Close the pressure cooker and cook as usual till rice is done.
- Remove the whole masala and Serve hot with any gravies.
Bagara Rice
And the Verdict:
As I said, it is perfect for parties and its mild flavor compliments with any type of gravy/curry.
Monday 18 August 2008
Karivepak(Curry Leaves) Chicken
This is the chicken recipe a bit different from the regular chicken curry I make. This was shared by my friend J and everyone at home loved the taste and flavor very much. It is definitely worth a try!
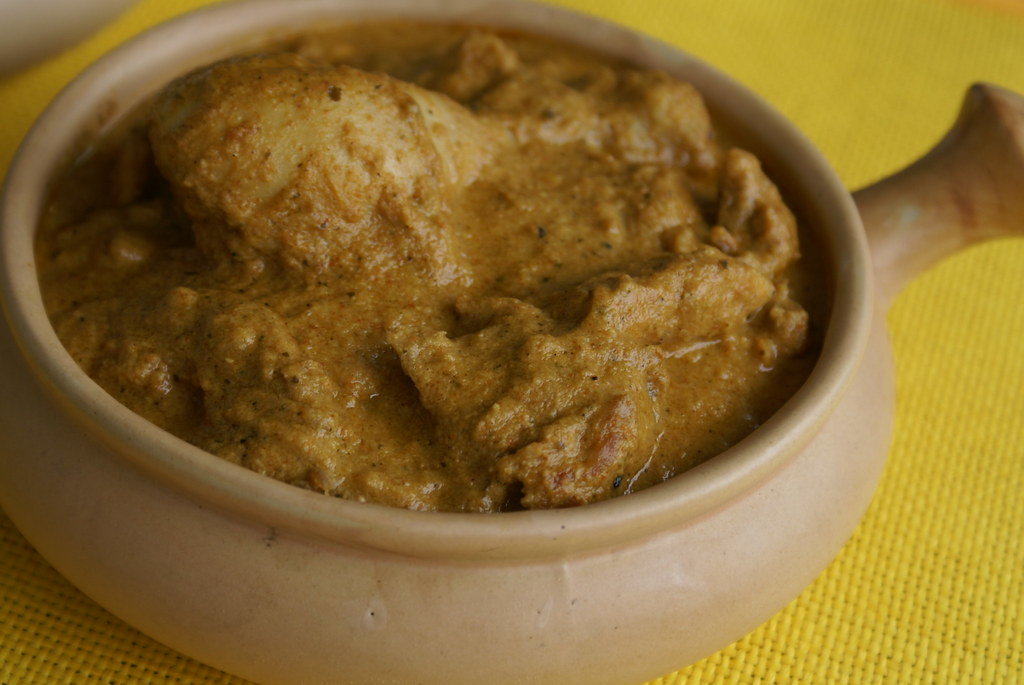
Karivepak Chicken
Ingredients:
To Marinate:
Karivepak Chicken
Food Event:
This is my entry for the Curry Mela event being hosted by dear SriValli of Cooking For All Seasons.
Awards.. Awards and more Awards:
I am utterly delighted that my blog is being showered with awards...... I am thankful to everyone out there, who thinks that my blog is worth them :-) Thank You all!!!
Usha of Veg Inspirations and LubnaKarim of KitchenFlavours passed me on "The Brilliant Web Blog Award".... Thank You Girls.
Vaidehi of Chakili passed on the "Friendship Award" .... Thank You Vaidehi.
Padma of Padma's Kitchen passed me on the "Arte Y Pico" award.
 Its really nice of her to think that content of my blog is creative, interesting, and it inspires the blogging community.
Thank You all for your sweet gestures... I am honored!!
Karivepak Chicken
Ingredients:
To Marinate:
Chicken: ½ kg, washed and cut into medium sized pieces
Curds: 3 tbsp
Red chilli powder: 1 tsp
Turmeric pwd: ¼ tsp
Turmeric pwd: ¼ tsp
Salt: to taste
Make a paste:
Cashewnuts: 3
WaterMelon seeds: 1 tsp
Chironji: 1 tsp
WaterMelon seeds: 1 tsp
Chironji: 1 tsp
Milk: 5 tbsp, add more if required
Dry roast and make a fine powder:
Cinnamon: 1" stick
Curry leaves: around 15
Cloves: 3- 5
Rest of the ingredients:
Oil: 3-4 tbsps
Onions: 2 big, finely chopped
Tomato: 1 large, finely chopped
Ginger-garlic paste: 1 tbsp
Coriander powder: 1 tsp
Black pepper powder: 1 tsp
Cumin powder: ¼ tsp
Cumin powder: ¼ tsp
Coriander leaves: for garnish
How I did it:
How I did it:
- Marinate chicken pieces in chilli powder, turmeric powder, curds and salt for 30 min.
- While the chicken pieces are marinating, make a paste of cashewnuts, watermelon seeds and chironji and milk. Keep aside. (If you dont have watermelon seeds and chironji, use around 10 cashewnuts).
- Dry roast cinnamon, cloves and curry leaves for 1 min and make a powder of them. Keep aside.
- Heat 1 1/2 tbsps of oil in a kadai. Add the onions and saute till pink. Add ginger-garlic paste and saute further for another 3-4 minutes on medium heat.
- Add coriander pwd, cumin pwd, pepper pwd and mix well and fry for another minute.
- Add the tomatoes and let it cook for 3-4 minutes. Combine well and cook till oil separates.Turn off heat. Cool and grind the cooked masala. Keep aside.
- Heat 1 1/2 tbsps oil in an other wide kadai and add the marinated chicken and cook on high flame for 4-5 minutes, reduce heat and cook covered for another 4-5 minutes.
- Add the ground masala paste, cashewnut paste and ground powder of cinnamon,cloves and curry leaves and combine well. Cook till chicken pieces are soft and you get the desired curry consistency. Adjust salt.Garnish with fresh coriander leaves.
And the Verdict:
Goes well with rotis or Jeera Rice/Bagara Rice. The curry leaves add the twist to the curry.
It is a hit with the family and I would definitely try it again.
Goes well with rotis or Jeera Rice/Bagara Rice. The curry leaves add the twist to the curry.
It is a hit with the family and I would definitely try it again.
Karivepak Chicken
Food Event:
This is my entry for the Curry Mela event being hosted by dear SriValli of Cooking For All Seasons.
Awards.. Awards and more Awards:
I am utterly delighted that my blog is being showered with awards...... I am thankful to everyone out there, who thinks that my blog is worth them :-) Thank You all!!!
Usha of Veg Inspirations and LubnaKarim of KitchenFlavours passed me on "The Brilliant Web Blog Award".... Thank You Girls.
Vaidehi of Chakili passed on the "Friendship Award" .... Thank You Vaidehi.
Padma of Padma's Kitchen passed me on the "Arte Y Pico" award.
 Its really nice of her to think that content of my blog is creative, interesting, and it inspires the blogging community.
Thank You all for your sweet gestures... I am honored!!
Monday 11 August 2008
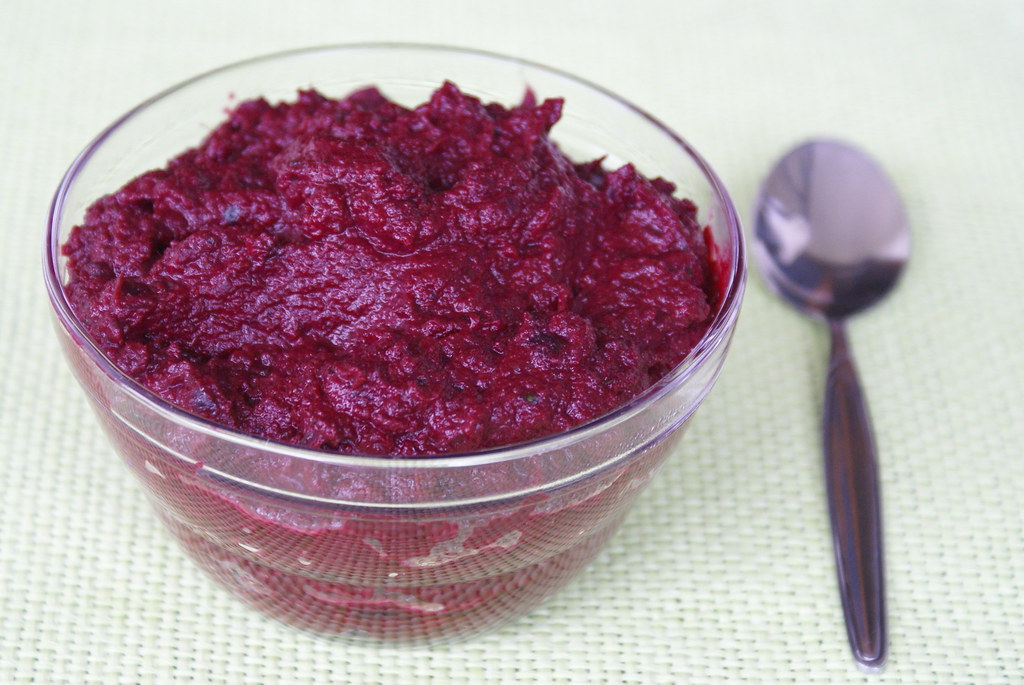
BeetRoot Chutney
Beet Root:I love this veggie because of the beautiful purple color it gives when added to any curry. Dietitians say that we need to eat rainbow of food everyday; i.e, include veggies or fruits from all the color bands like,
Red(Strawberries, Red Bell Pepper, Water Melon, Cherries etc),
Orange and Yellow(Apricots, Oranges, Papaya, Peach, Pumpkin etc),
Greens(Broccoli, Lettuce, Kiwi, Spinach etc) and
Blues and Purple(Blackberries, Black currants, Red cabbage and Beetroots).
The more of these colorful foods that you can fit into your daily diet, the better.
BeetRoot Chutney
Coming to the Recipe...
Ingredients:
Beet Roots: 2 medium
Green Chillies: 5 to 6, adjust acc. to your taste
Curry leaves: 10 to 15
Tamarind: size of small sized lemon
Coriander leaves: a handful
Salt: to taste
Oil: 2 tbsp
How I did it:
The Romans considered beetroot an aphrodisiac (it’s rich in the mineral boron which is important in the production of human sex hormones). The belief persists to this day that if a man and a woman eat from the same beetroot, they will fall in love.
Nutritional Facts:
Beetroot has a higher sugar content than most vegetables. It is rich in vitamin C, fibre, potassium, magnesium, manganese, and folic acid. The leafy tops are an excellent source of beta-carotene, iron and calcium.
Beetroot contains betaine, a substance that relaxes the mind and is used to treat depression. It also contains trytophan (also found in chocolate!) which contributes to a sense of well being.
Sign of Friendship:
Pallavi of All Things Yummy has passed me on the "Blogging Friends Forever" award.Thank You Pallavi for this sweet gesture.....
 I would like to pass on this award to every food blogger who visits me, and leave encouraging comments in my blog, which is like great inspiration for me. Thank You all!!!
Have a wonderful day!
Red(Strawberries, Red Bell Pepper, Water Melon, Cherries etc),
Orange and Yellow(Apricots, Oranges, Papaya, Peach, Pumpkin etc),
Greens(Broccoli, Lettuce, Kiwi, Spinach etc) and
Blues and Purple(Blackberries, Black currants, Red cabbage and Beetroots).
The more of these colorful foods that you can fit into your daily diet, the better.
BeetRoot Chutney
Coming to the Recipe...
Ingredients:
Beet Roots: 2 medium
Green Chillies: 5 to 6, adjust acc. to your taste
Curry leaves: 10 to 15
Tamarind: size of small sized lemon
Coriander leaves: a handful
Salt: to taste
Oil: 2 tbsp
How I did it:
- Chop beetroot and green chillies.
- Heat oil in a kadai and add curry leaves, beetroot and green chillies.
- Fry on medium till done. Takes about 10 min.
- After switching off the gas, add chopped coriander, mix well and keep aside to cool.
- Soak tamarind in hot water, to make it soft.
- Now grind the cooled mixture, to a coarse paste, along with tamarind and salt without adding any water.
- This can be served with plain hot steamed rice, or with any breakfast like idly and dosa.
The Romans considered beetroot an aphrodisiac (it’s rich in the mineral boron which is important in the production of human sex hormones). The belief persists to this day that if a man and a woman eat from the same beetroot, they will fall in love.
Nutritional Facts:
Beetroot has a higher sugar content than most vegetables. It is rich in vitamin C, fibre, potassium, magnesium, manganese, and folic acid. The leafy tops are an excellent source of beta-carotene, iron and calcium.
Beetroot contains betaine, a substance that relaxes the mind and is used to treat depression. It also contains trytophan (also found in chocolate!) which contributes to a sense of well being.
Sign of Friendship:
Pallavi of All Things Yummy has passed me on the "Blogging Friends Forever" award.Thank You Pallavi for this sweet gesture.....
 I would like to pass on this award to every food blogger who visits me, and leave encouraging comments in my blog, which is like great inspiration for me. Thank You all!!!
Have a wonderful day!
Thursday 7 August 2008
Chocolate Banana Cake
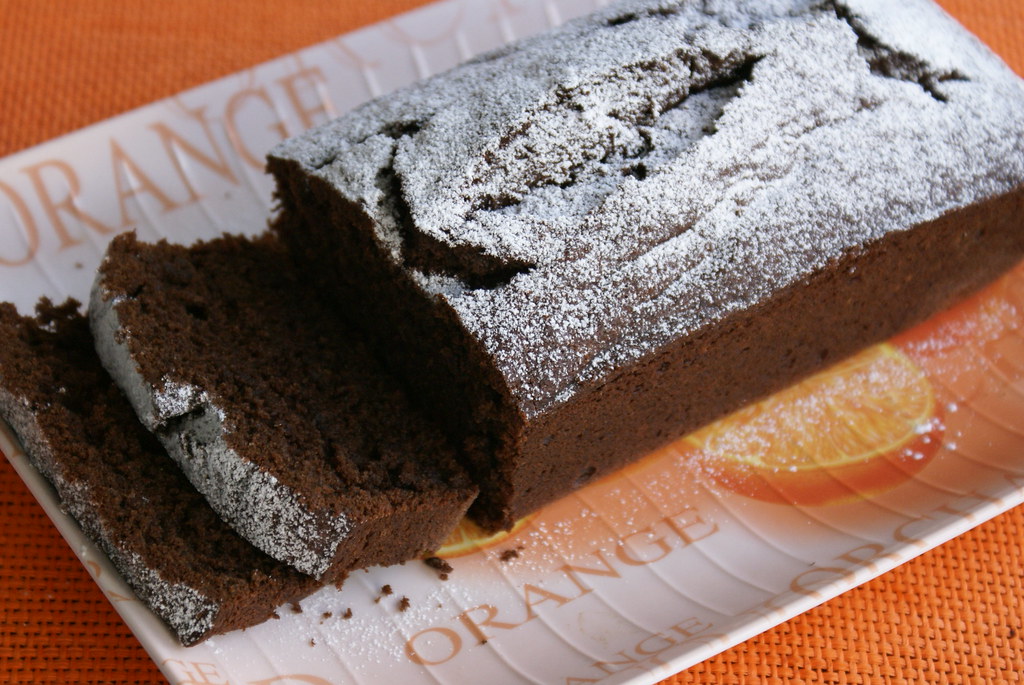
Chocolate Banana Cake
I had few bananas, which were untouched and became ripe. And I thought it was time to put them to some use. The first thought that came into my mind is a banana cake..... but I am such a chocoholic that I wanted some chocolate also in the cake. So the best thing is Chocolate Banana cake.
The bananas add the extra sweetness to the cake and keep it really moist and fresh for 2 or 3 days. It is perfect as tea time cake.
Ingredients:
All Purpose Flour : 175 gms
Cocoa Powder : 25 gms
Baking Powder : 1 tsp
Brown Sugar or Golden Caster Sugar : 175 gms
Butter : 150 gms, softened
Eggs : 3, at room temperature
Bananas : 2 large, ripe and mashed
Dark Bitter Chocolate or Plain Chocolate : 100 gms
Icing Sugar : 1 tbsp
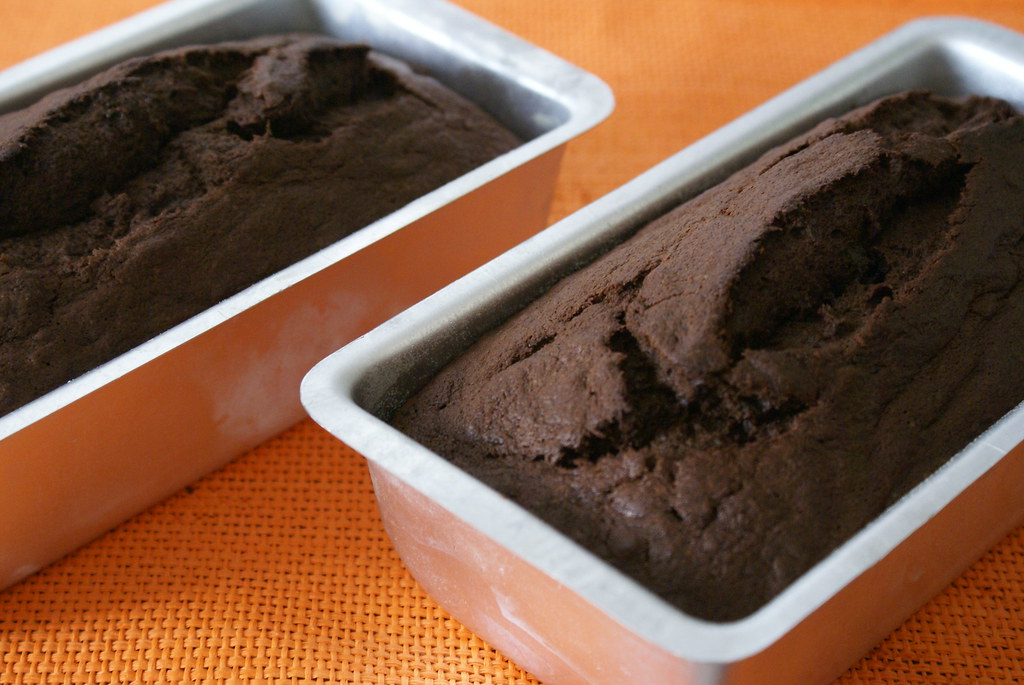
Cakes : Out of Oven
How I did it:
- Heat the oven to 180C.
- Butter and flour the bases of two loaf tins.
- Melt the chocolate either in the microwave or in a small glass bowl set over a pan of barely simmering water. Stir until smooth and remove from the heat.
- Cream together the softened butter and sugar until pale and fluffy. Gradually add the eggs, one by one, beating well between each addition.
- Sift together the flour, baking powder and cocoa and fold in using a large rubber spatula.
- Add the mashed banana and chocolate and mix well.
- Divide the mixture between the 2 tins and bake for about 45 minutes or until a skewer inserted in the middle comes out clean. Cool on a wire rack.
- Dust with icing sugar and serve warm or at room temperature.
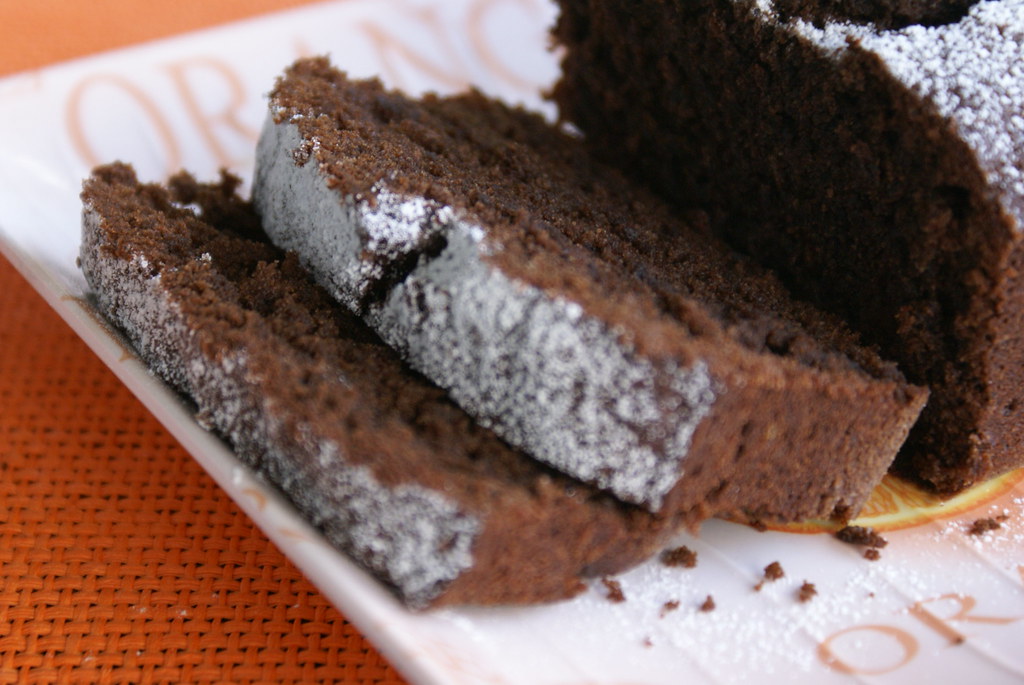
Chocolate Banana Cake
And the Verdict:
Rich, Chocolaty, moist and mild sweetness of the bananas.... yummmmm... can anyone resist this? :-)
I used dark bitter chocolate, and J dint like that bitter taste in cake. So I would use plain chocolate next time.
Monday 4 August 2008
Gutti Vankaya Koora / Stuffed Brinjal Curry
When talking about Andhra Cuisine, you will surely come across the curry Gutti Vankaya or Stuffed Brinjals. It is usually made with tender, short and round type of purple brinjals.
It is made with a variety of stuffings and the taste differs from one region to an other. The recipe I am posting is my mom's recipe and our favourite.
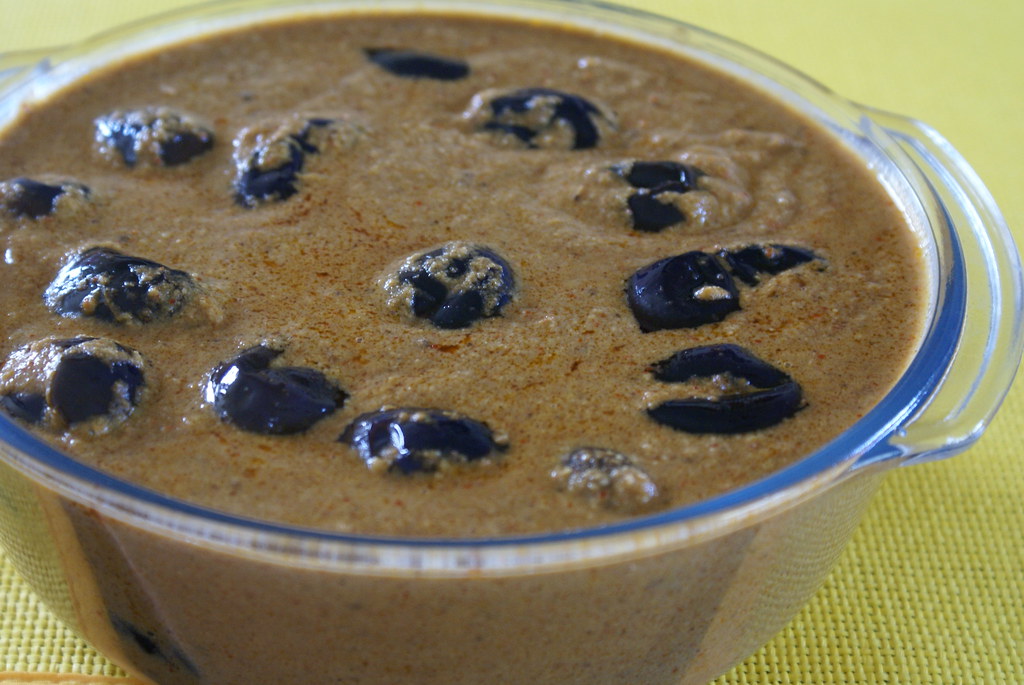
Gutti Vankaya (Stuffed Brinjals)
Ingredients:
Brinjals: 1/2 kg
Onions: 2 medium size
Ginger-Garlic : 1tbsp
Tamarind paste : 2 tbsp / or tamarind size of lemon
Peanuts: 1/2 cup
Nuvvulu / Sesame Seeds : 1/4 cup
Garam masala : 1/2 tsp
Salt : to taste
Red chilli pwd : 1 tbsp, or acc. to your taste
Haldi / Turmeric: 1/4 tsp
Oil: 3tbsp
How I did it:
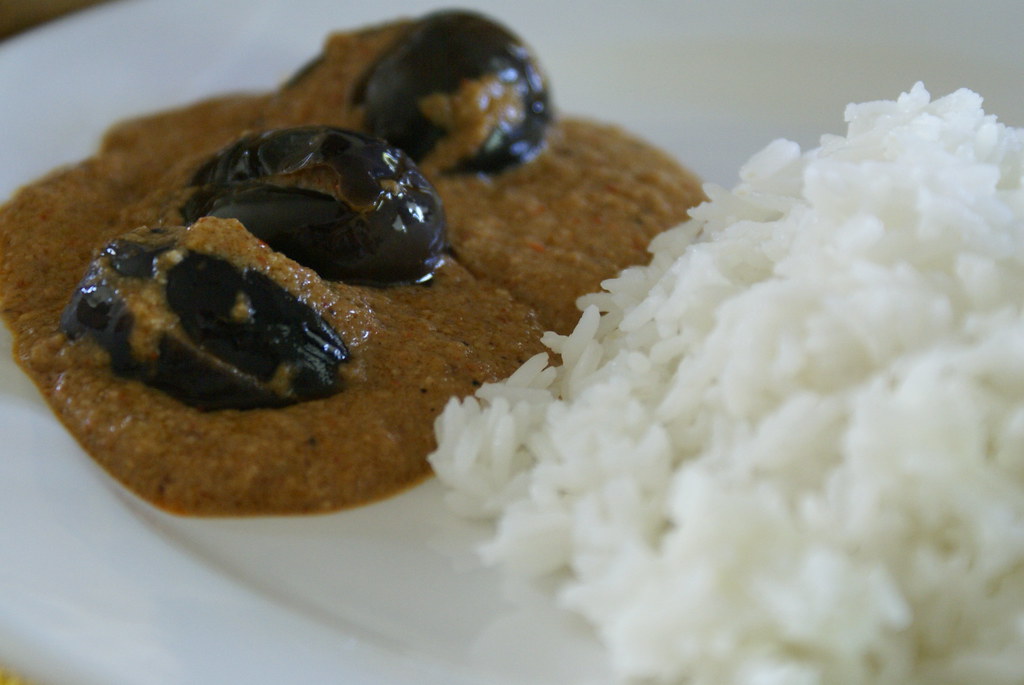
Gutti Vankaya, served with steaming white rice
It is made with a variety of stuffings and the taste differs from one region to an other. The recipe I am posting is my mom's recipe and our favourite.
Gutti Vankaya (Stuffed Brinjals)
Ingredients:
Brinjals: 1/2 kg
Onions: 2 medium size
Ginger-Garlic : 1tbsp
Tamarind paste : 2 tbsp / or tamarind size of lemon
Peanuts: 1/2 cup
Nuvvulu / Sesame Seeds : 1/4 cup
Garam masala : 1/2 tsp
Salt : to taste
Red chilli pwd : 1 tbsp, or acc. to your taste
Haldi / Turmeric: 1/4 tsp
Oil: 3tbsp
How I did it:
- Chop onions, and fry in a tsp of oil.
- Roast peanuts and sesame seeds, with out any oil.
- Grind together, all the ingredients (onions, peanuts, sesame seeds, ginger garlic paste, tamarind paste, salt, turmeric, red chilly pwd, garam masala), to a fine paste.
- Wash brinjals and pat dry. Make 4 slits on each brinjal, on the opposite side of the stem, taking care not to cut it completely.
- Fill in the paste in all brinjals. This step requires some patience, separate the slits of the brinjal carefully and stuff the masala taking care not to break the brinjal.
- Add oil in a pan , and add all the brinjals, once the brinjals are 3/4th done, add some water to the remaining paste and add it to the brinjals.
- Cover and simmer for few mins, till it comes to a boil, and the brinjals are done.
- Serve hot with rice or rotis.
Gutti Vankaya, served with steaming white rice
And the Verdict:
The stuffing makes the curry really special. It has got the yummy fiery taste and is absolutely delicious.
Food Event:
This is my entry for the Curry Mela event being hosted by dear SriValli of Cooking For All Seasons.
The stuffing makes the curry really special. It has got the yummy fiery taste and is absolutely delicious.
Food Event:
This is my entry for the Curry Mela event being hosted by dear SriValli of Cooking For All Seasons.
Wednesday 30 July 2008
Bell Pepper Chutney and Awards
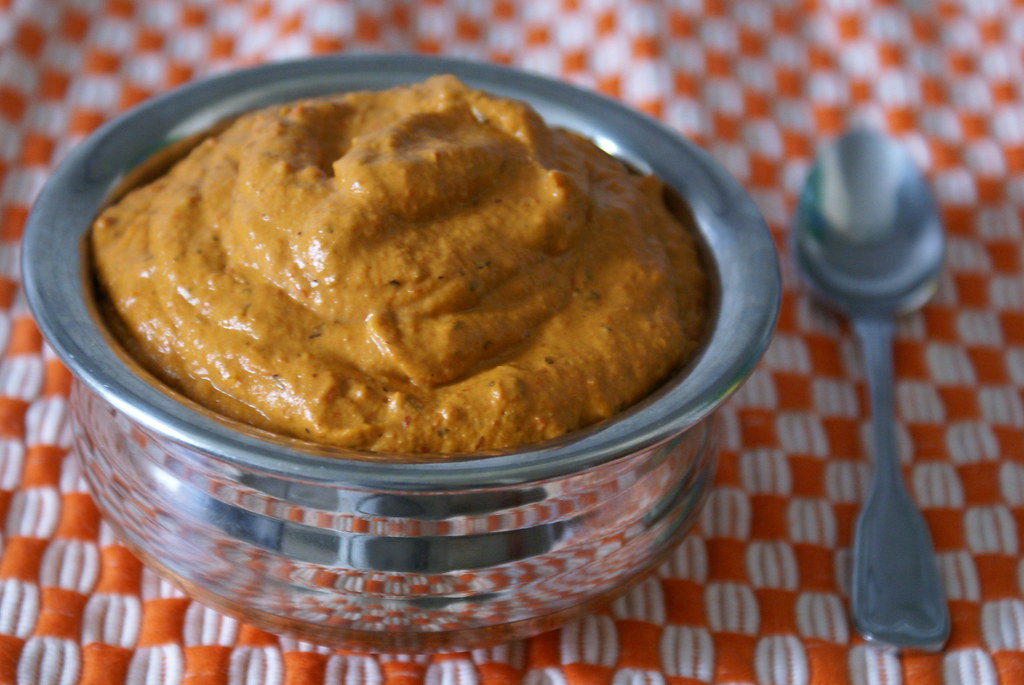
Bell Pepper Chutney
As everyone says, Breakfast is the most important meal of the day..... being a working woman.. I usually dont have enough time to make something special in the morning every day. So mostly we have either Idly or Dosa every alternate week. For these I can prepare the batter on sunday, so that it lasts for me for the whole week.
The other problem that arises is the chutney.... eating peanut or coconut chutney everyday is not that very healthy option. So when I was searching for alternatives on my favourite blogs, I came across this bell pepper chutney in Indira's Mahanandi blog.
It is very healthy, tasty and easy to prepare....
Ingredients:
Red Bell Peppers : 2, chopped
Onion : 1, chopped
Peanuts : 1/2 cup
Dry Red Chillies : 10, adjust accord. to your taste buds
Garlic : 2 cloves
Tamarind paste : 1 tbsp
Salt : to taste
Oil : 1 tbsp
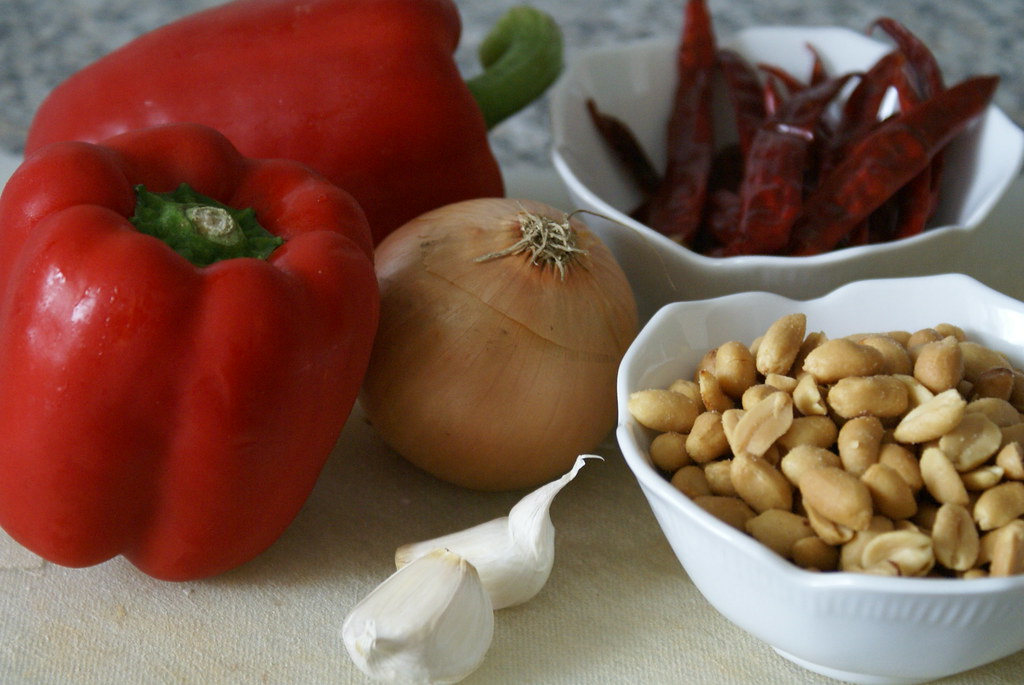
Ingredients
How I did it:
- Heat oil in a kadai and add red chillies, bell peppers, garlic and onion and roast till done.
- Dry roast peanuts in a seperate pan. (I used already roasted tinned peanuts).
- Once the roasted veggies cool, grind all the ingredients to a coarse paste without adding any water.
- Serve with any breakfast like, idly or dosa.. even tastes good with hot rice.
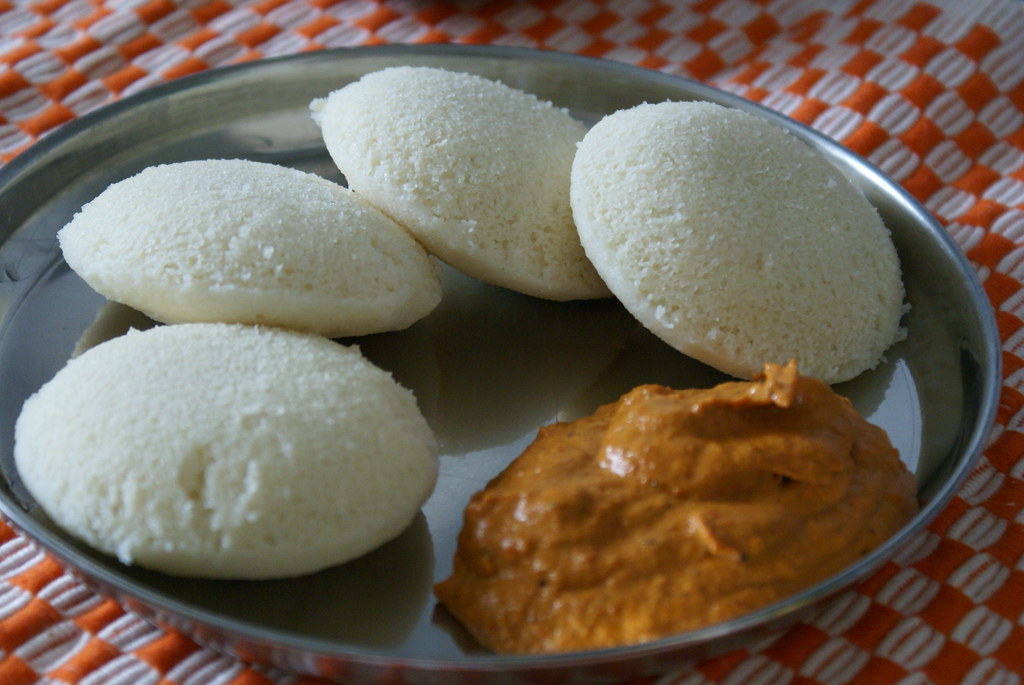
Served with Idly
And the Verdict:
J liked it very much, it was different from the regular chutneys we have. It has a mild sweet taste from the red peppers and was very yummy.
I served it with Idlies and it was a huge hit.
Some Award Announcements:
Mona from Zaiqa forwarded me this "Brilliant WebBlog Prize".
 Brilliant Weblog is a prize given to sites and blogs that are smart and brilliant both in their content and their design. The purpose of the prize is to promote as many blogs as possible in the blogsphere. Here are the rules to follow:
 - When you recieve the prize you must write a post showing it, together with the name of who has given it to you, and link them back.
- Choose a minimum of 7 blogs (or even more) that you find brilliant in their content or design. Show their names and links and leave them a comment informing they were prized with ‘Brilliant Weblog’.
- Show a picture of those who awarded you and those you give the prize (optional).
Amulya of Amu's World passed on this "Yummy Blog Award". Thank You dear for this....
 I would like to Thank both Amulya and Mona... for these awards... Thank You Girls!!!
Monday 28 July 2008
Cherry Polka Dot Cake
I love summer, mainly because of the warm sun... because of the barbeque parties we can have... for the lazy afternoons we can spend lake sides.... and most importantly because of the exotic fruits we get to eat... Mangoes, Strawberries.... and ofcourse Cherries .... yummm.. I just love these red, juicy fruits...
Last weekend I have been to the farmers market and could'nt resist myself in buying these..

Fresh Cherries
The best recipe I can suggest with cherries is..... take them in a big bowl... switch on your favourite movie and just relish them as they are :-)
But J wanted something different. I had this recipe bookmarked long back and wanted to surprise him.

Cherry Cake
Recipe Source : Joy Of Baking
Ingredients:
Fresh Cherries: 500 gms, pitted and halved
All Purpose Flour(Maida) : 210 gms
Baking Powder : 1 1/2 tsp
Salt : 1/4 tsp
Eggs : 2, at room temperature
Sugar : 150 gms
Butter : 110 gms, soft, at room temperature
Milk : 80 ml
Vanilla Essence : 1 tsp
How I did it:

Yummy Slice of Cake
And the verdict:
Wow... just heavenly... the sweetness from the cherries enhanced the taste of the cake.. and with each bite I could feel the yumm taste of the juicy cherries...
Divine!!!
Last weekend I have been to the farmers market and could'nt resist myself in buying these..
Fresh Cherries
The best recipe I can suggest with cherries is..... take them in a big bowl... switch on your favourite movie and just relish them as they are :-)
But J wanted something different. I had this recipe bookmarked long back and wanted to surprise him.
Cherry Cake
Recipe Source : Joy Of Baking
Ingredients:
Fresh Cherries: 500 gms, pitted and halved
All Purpose Flour(Maida) : 210 gms
Baking Powder : 1 1/2 tsp
Salt : 1/4 tsp
Eggs : 2, at room temperature
Sugar : 150 gms
Butter : 110 gms, soft, at room temperature
Milk : 80 ml
Vanilla Essence : 1 tsp
How I did it:
- Pre heat oven at 200 degrees C.
- Butter and Flour a 9 inch cake pan.
- Separate around 15- 20 cherries (to be placed on top of the cake).
- In a bowl mix together flour, baking powder and salt.
- In a separate bowl beat together butter and sugar till light and fluffy.
- Then add eggs one by one and beat till pale yellow.
- Add the milk and vanilla essence and beat till incorporated.
- Add the flour mixture and with the help of a wooden spoon or rubber spatula, mix well.
- Gently fold in the cherries (not the 15 cherries which were separated).
- Pour the batter into the prepared pan and smooth on top with the help of the spatula.
- Bake for 15 mins. Remove the pan and quickly arrange the cherries on top, with cut side down.
- Put back the cake in the oven, and bake till done, for about 30 to 40 mins. Or till toothpick inserted into the cake comes out clean.
- Serve warm, or at room temperature.
Yummy Slice of Cake
And the verdict:
Wow... just heavenly... the sweetness from the cherries enhanced the taste of the cake.. and with each bite I could feel the yumm taste of the juicy cherries...
Divine!!!
Thursday 24 July 2008
Eggs in Tomato Gravy
Eggs... or shall I call them Incredible Eggs. Why Incredible?? Because, One egg has 13 essential nutrients in varying amounts – including the highest quality protein, choline, folate, iron and zinc – for only 75 calories. Eggs also play a role in weight management, muscle strength, healthy pregnancy, brain function, eye health and more.
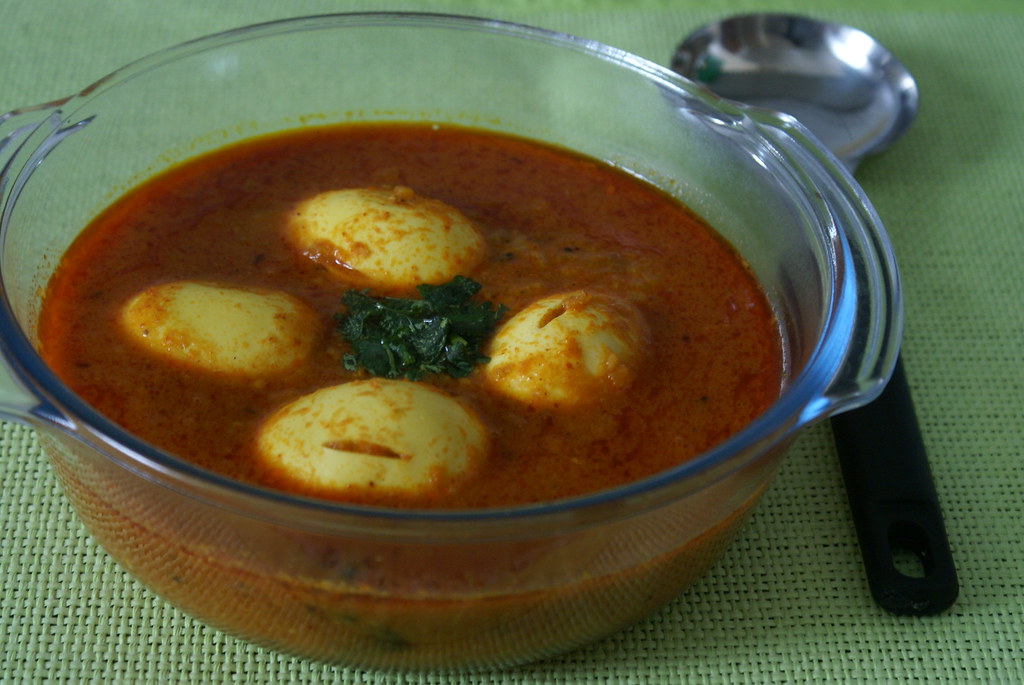
Eggs in Tomato Gravy
Inexpensive, convenient and delicious, eggs are the perfect choice for the entire family. They can be prepared quickly in a variety of ways to suit everyone’s taste buds.
Coming to the recipe...
Ingredients:
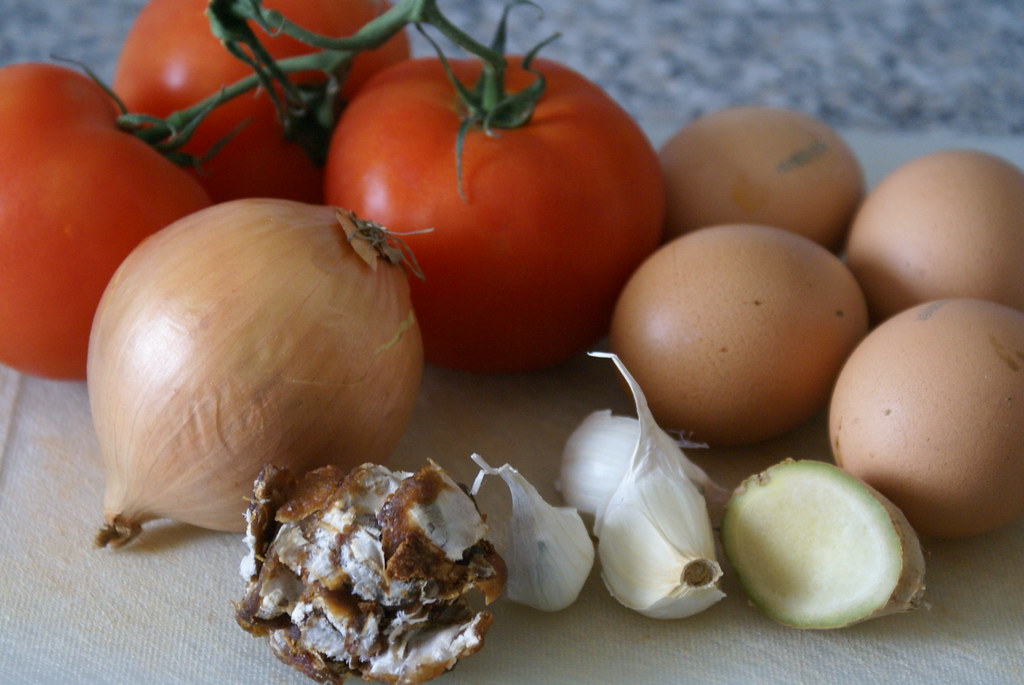
Ingredients
Eggs: 4
Onion: 1 big
Tomato: 3 big
Ginger: 1 inch piece
Garlic: 3 pods
Tamarind: size of lemon
Salt: as per taste
Red Chilly Powder: 1 tsp
Garam Masala: 1 tsp
Turmeric: 1/2 tsp
Oil: 3 tbsp
For Tadka:
Dry Red Chilly: 2
Mustard: 1 tsp
Jeera: 1 tsp
Urad dal: 1 tsp
Method:

Eggs served with Hot Rice
And the Verdict:
Very delicious and healthy... tastes even better with hot rice :-)
Food Event:
This is my entry for the Curry Mela event being hosted by dear SriValli of Cooking For All Seasons.
Eggs in Tomato Gravy
Inexpensive, convenient and delicious, eggs are the perfect choice for the entire family. They can be prepared quickly in a variety of ways to suit everyone’s taste buds.
Coming to the recipe...
Ingredients:
Ingredients
Eggs: 4
Onion: 1 big
Tomato: 3 big
Ginger: 1 inch piece
Garlic: 3 pods
Tamarind: size of lemon
Salt: as per taste
Red Chilly Powder: 1 tsp
Garam Masala: 1 tsp
Turmeric: 1/2 tsp
Oil: 3 tbsp
For Tadka:
Dry Red Chilly: 2
Mustard: 1 tsp
Jeera: 1 tsp
Urad dal: 1 tsp
Method:
- Boil eggs and remove the shells and keep aside.
- Blanch tomatoes in boiling water for 10 mins. Cool and grind.
- Pass it through a seive to get fine puree.
- Chop onions very finely.
- Grind ginger and garlic. (Alternatively you can use 1 tbsp of GingerGarlic paste).
- Soak tamarind in warm water and extract the pulp.
- Heat oil in a wide kadai.
- Add all the ingredients for tadka.
- After they splutter, add the finely chopped onions and turmeric.
- Fry for 5 mins and add ginger garlic paste.
- Fry for few more mins, and add tomato puree.
- Add salt, red chilly powder. Mix and cover.
- Let it simmer for few mins, approx 10 -15 mins
- Now add tamarind pulp, garam masala.
- Mix and add eggs.
- Simmer for 10 more mins.
- Garnish with corriander and Serve hot with Rice.
Eggs served with Hot Rice
And the Verdict:
Very delicious and healthy... tastes even better with hot rice :-)
Food Event:
This is my entry for the Curry Mela event being hosted by dear SriValli of Cooking For All Seasons.
Tuesday 1 July 2008
Methi & Paneer Stuffed Paratha
From the time the summer started this year, I have been growing some fresh greens in my balcony. Yesterday, I have observed that Methi has grown to its full size.. lush green and healthy...
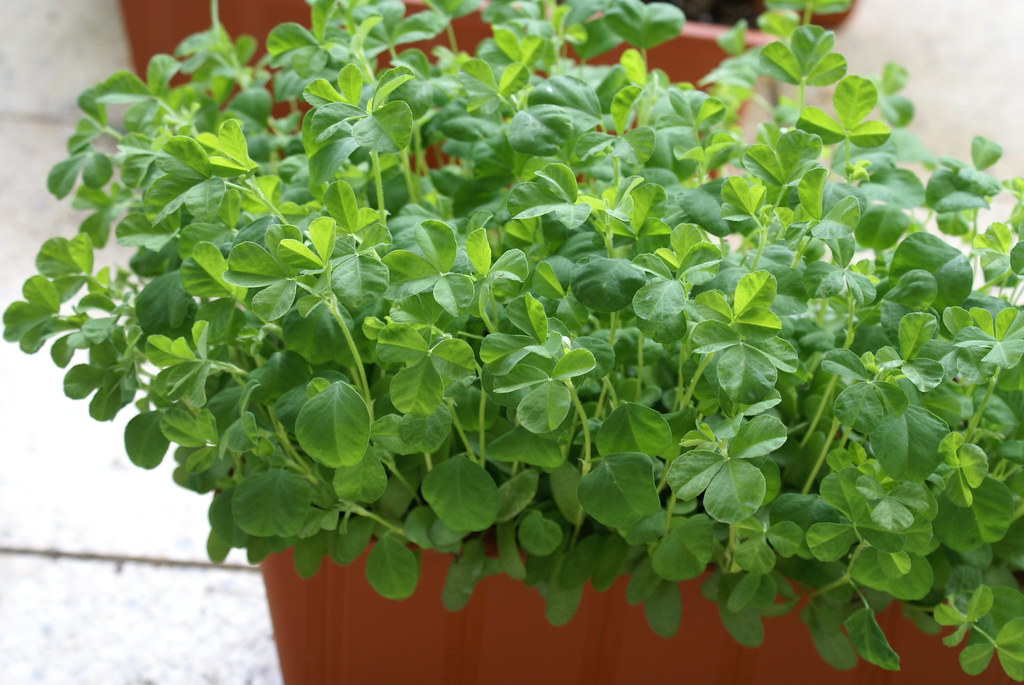
Fresh Methi
So I have been listing all the recipes made out of Methi...
Aloo Methi
Methi Dal
Methi Paratha... yummm.. this must be tasting too good... :-)

Methi-Paneer Paranths with Carrot-Tomato Raita
And to add that extra shahi touch... how about adding some fresh paneer and some mint leaves to the filling... sounds heavenly is'nt it....
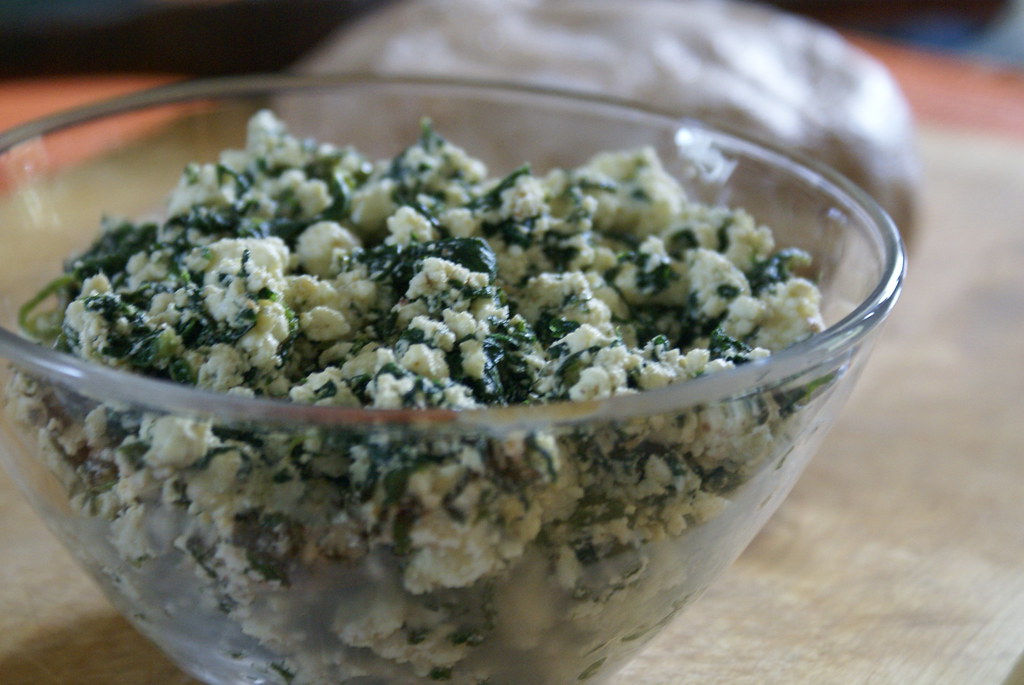
Methi-Paneer Filling
Ingredients:
For The Filling:
Fresh Crumbled Paneer: 2 cups
Fresh Methi Leaves: 2 big bunches, finely chopped
Ginger: 1 tsp, finely chopped
Green chillies: 3, finely chopped
Mint Leaves: 2 tbsp, finely chopped (optional)
Garam Masala: 2 tsp
Pepper Powder: 2 tsp
Salt, to taste
Oil: 2 tbsp
For the dough:
Whole Wheat Flour: 3 cups
Maida (all purpose flour): 1 cup
Water: as needed
Oil, to fry
How I did it:
Methi-Paneer Paranths with Carrot-Tomato Raita
And the verdict:
Just Yummy..... Methi is a very healthy option to use in parathas, unlike the regular aloo ones. Adding the paneer gives it a shahi touch and the mint leaves add the extra aroma..... It was just a lovely dinner :-)
Fresh Methi
So I have been listing all the recipes made out of Methi...
Aloo Methi
Methi Dal
Methi Paratha... yummm.. this must be tasting too good... :-)
Methi-Paneer Paranths with Carrot-Tomato Raita
And to add that extra shahi touch... how about adding some fresh paneer and some mint leaves to the filling... sounds heavenly is'nt it....
Methi-Paneer Filling
Ingredients:
For The Filling:
Fresh Crumbled Paneer: 2 cups
Fresh Methi Leaves: 2 big bunches, finely chopped
Ginger: 1 tsp, finely chopped
Green chillies: 3, finely chopped
Mint Leaves: 2 tbsp, finely chopped (optional)
Garam Masala: 2 tsp
Pepper Powder: 2 tsp
Salt, to taste
Oil: 2 tbsp
For the dough:
Whole Wheat Flour: 3 cups
Maida (all purpose flour): 1 cup
Water: as needed
Oil, to fry
How I did it:
- Heat 2 tbsp of oil in a kadai, and add chopped ginger and green chillies, fry for a minute and then add the fresh chopped Methi leaves and Mint Leaves; add salt and let it cook for 2 minutes.
- All the excess water from the leaves oozes out, carefully, separate the water. You can use this water while kneading the dough.
- Add this methi mixture to the fresh crumbled panner.
- Add Garam masala powder and pepper powder. Mix well. Keep aside.
- Knead the dough with the whole wheat flour and maida. Cover the dough with a wet muslin cloth and let it rest for about 30 mins.
- Roll out small balls of the dough and fill with 1 tbsp of the filling.
- Roll out the dough with a rolling pin. Dust liberally with flour to avoid the stickiness.
- Pat off the excess flour and roast on a hot griddle.
- Fry one side for 1 minute and then turn over and brush with a little oil.
- When the second side is done and golden brown, flip and brush with a little oil on that side too.
- Serve hot with raita.
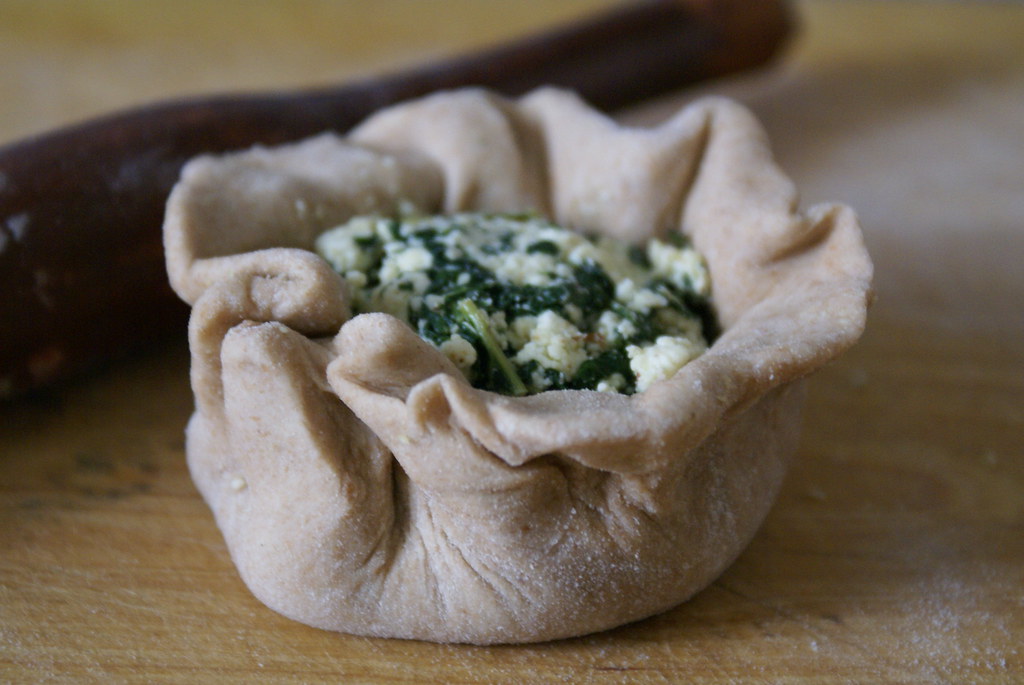
In The Making
Methi-Paneer Paranths with Carrot-Tomato Raita
And the verdict:
Just Yummy..... Methi is a very healthy option to use in parathas, unlike the regular aloo ones. Adding the paneer gives it a shahi touch and the mint leaves add the extra aroma..... It was just a lovely dinner :-)
Tuesday 22 April 2008
Indo-Chinese Cooking : Chilly Chicken
I always loved chinese food, especially Indo-Chinese. When I first came to Germany, J took me to a chinese restaurant, and when the menu cards arrived, I eagerly opened them to find dishes like Manchuria, Chilly Chicken, Ginger Chicken etc etc... But to my surprise I found something like Kung-Pao, Chicken in sweet and sour sauce etc...
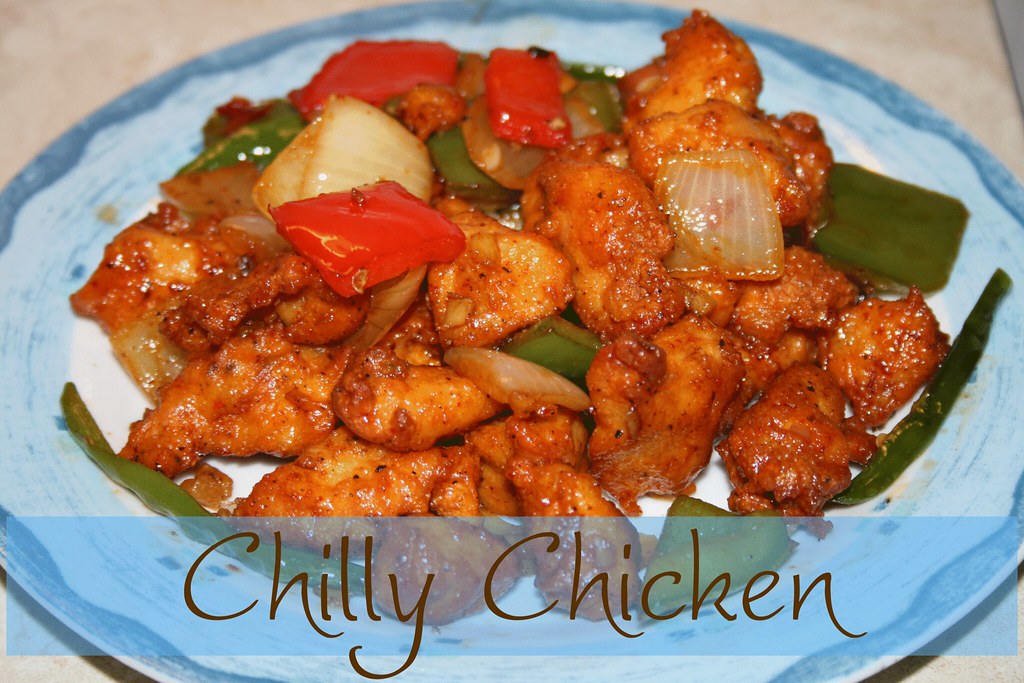
I was very much disappointed at the fact that, Manchuria and Chilly Chicken etc, are found only the the Chinese restaurants in India.
Last weekend we have been to our friend's place in Munich, and suddenly the two men J and J wanted to have something spicy and so we decided to make Chilly Chicken, after browsing on net for the recipe, and after mix and match from here and there, we came up with this recipe.
Ingredients:
For Chicken:
Chicken Breasts: 500 gms, cut into bite sized pieces
Cornflour: 1 tbsp
Egg: 1
Salt: to taste
Ajnimotto: 1/4 tsp
Ginger Garlic Paste: 1 tbsp
Pepper Powder: 1 tsp
Oil: for frying
To Finish:
Oil: 2 tbsp
Green Chillies: 8 to 10, slit length wise, acc. to your taste buds
Capsimcum: 1 large, cut into cubes
Onions: 1 large, cut into cubes
Chopped Ginger: 1 tbsp
Chopped Garlic: 1 tbsp
Salt: to taste
Soya Sauce: 2 tbsp
Ajnimotto: 1/4 tsp
Red Chilly Sauce: 1 tbsp
Cornflour: 1 tbsp, mixed in little water
Spring Onions: to garnish

Chilly Chicken : The Steps
How I did it:
Spicy, yummy.. and though it comes under chinese cusine, its truly Indian at heart :)
I was very much disappointed at the fact that, Manchuria and Chilly Chicken etc, are found only the the Chinese restaurants in India.
Last weekend we have been to our friend's place in Munich, and suddenly the two men J and J wanted to have something spicy and so we decided to make Chilly Chicken, after browsing on net for the recipe, and after mix and match from here and there, we came up with this recipe.
Ingredients:
For Chicken:
Chicken Breasts: 500 gms, cut into bite sized pieces
Cornflour: 1 tbsp
Egg: 1
Salt: to taste
Ajnimotto: 1/4 tsp
Ginger Garlic Paste: 1 tbsp
Pepper Powder: 1 tsp
Oil: for frying
To Finish:
Oil: 2 tbsp
Green Chillies: 8 to 10, slit length wise, acc. to your taste buds
Capsimcum: 1 large, cut into cubes
Onions: 1 large, cut into cubes
Chopped Ginger: 1 tbsp
Chopped Garlic: 1 tbsp
Salt: to taste
Soya Sauce: 2 tbsp
Ajnimotto: 1/4 tsp
Red Chilly Sauce: 1 tbsp
Cornflour: 1 tbsp, mixed in little water
Spring Onions: to garnish
Chilly Chicken : The Steps
How I did it:
- Mix chicken with all other ingredients, mentioned under 'For Chicken'.
- Heat oil in a wide pan, and fry the chicken.
- Keep aside.
- Take an other deep pan, add little oil.
- When hot, add green chillies and chopped ginger and garlic.
- Then add Onions and Capsicum.
- Add little salt and fry for 5 mins.
- Add Soya Sauce, and ajnimotto and Chilli Sauce.
- Fry for 2 mins more.
- Add the fried chicken pieces and 2 to 3 tbsp of cornflour mixed in water.
- Mix well and fry for 2 more mins.
- Serve Hot.
Spicy, yummy.. and though it comes under chinese cusine, its truly Indian at heart :)
Sunday 13 April 2008
Onion Pesarattu (MoongDal Dosa)
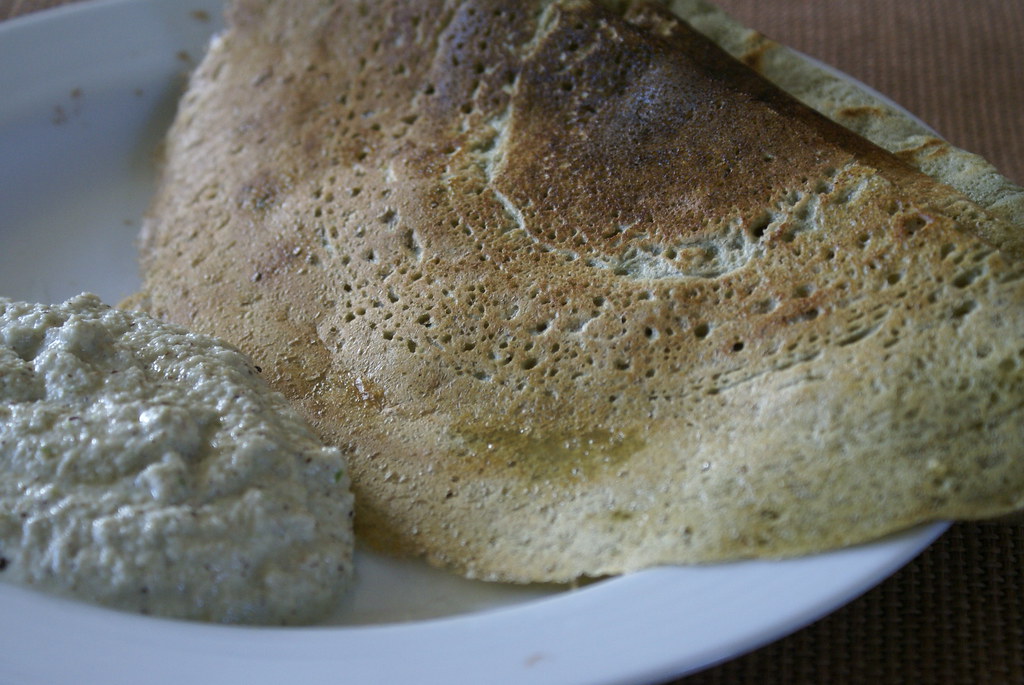
Pesarattu with Coconut Chutney
Whenever we used to visit a udipi restaurant, the first thing that I would order was DOSA. I always used to spend atleast 10 mins on the menu reading all types of dosas available. As far as I can remember only Dosa has such huge variety of variations - Plain Dosa, Onion Dosa, Masala Dosa, Paper Dosa, Rava Dosa, Set Dosa, MLA Dosa and what not :)
One variety which I like in Dosa apart from the above mentioned is Pesarattu. I always used to wonder why is this not mentioned under Dosa category in restaurant menu.
I have been reading all the blogs from past 3 months, and it has been raining Dosas in Blogosphere since the day Srivalli announced the Dosa Mela. I felt very bad missing all the fun becoz of Morning Sickness, but I am glad that I am able to make it before the deadline :)
Onion Pesarattu:
Ingredients:
MoonDal(Whole or Split): 1 1/2 cups
Salt: to taste
Water: as needed, while grinding
For Topping:
Onion: 1, finely chopped
Green Chillies: 5, finely chopped
Ginger: 2 inch piece, finely chopped
Soaked MoongDal and Dosa Batter
How I did it:
- Soak MoongDal overnight in sufficient water.
- Grind it to Dosa consistency the following morning, using water as required.
- Mix salt.
- There is no need to ferment the Pesarattu Batter as we do it for regular Dosa.
- Take a Dosa tava and when hot put a ladle full of batter and spread it.
- Mix all the ingredient mentioned under topping, and put a spoonful on the dosa.
- Put oil on the sides and on the dosa.
- Let it fry till crisp. There is no need to turn over.
- Serve Hot with Coconut Chutney.

In Process!
Yummy!!
And The Verdict:
A very wholesome, nutritious and delicious breakfast... Just Yummyyy!!!
Food Event:
This is my entry for the Dosa Mela event being hosted by dear SriValli of Cooking For All Seasons.
Subscribe to:
Posts (Atom)